How To Maintain a Chisel
Work sheet:
| sharpening_a_chisel.pdf |
Step One
How do you know if a chisel needs to be sharpened? What am I looking for? If a chisel does not have a completely flat bevel or has chips missing on the end of the bevel it is not sharp.
How do you know if a chisel needs to be sharpened? What am I looking for? If a chisel does not have a completely flat bevel or has chips missing on the end of the bevel it is not sharp.
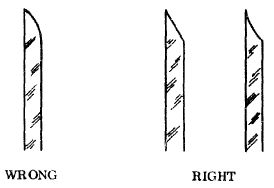
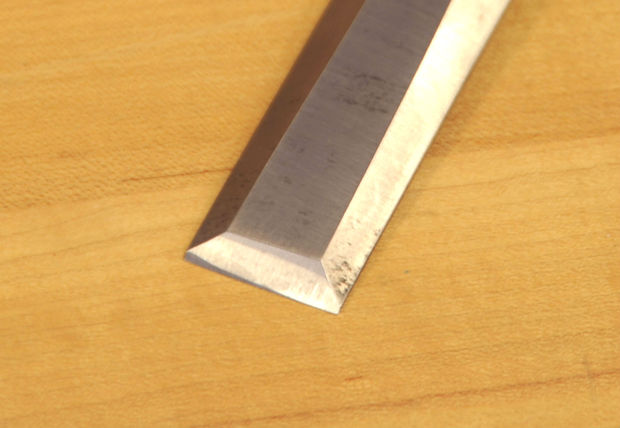
A Blunt chisel, look at the bevel edge.
Step Two
It is important to note that any imperfections on the chisel on either the bevel or the back will impact its effectiveness. Ideally, you need to ensure that you have two perfectly smooth surfaces so they will meet to form the cutting edge.
It is important to note that any imperfections on the chisel on either the bevel or the back will impact its effectiveness. Ideally, you need to ensure that you have two perfectly smooth surfaces so they will meet to form the cutting edge.
Step Three
One of the most overlooked part of sharpening a chisel is flattening and polishing the back. Using the following items you can best achieve this.
Recipe for success:
· 1 spray bottle of water
· Sandpaper from grades 80, 120, 150 to 220
· 1 piece plate glass
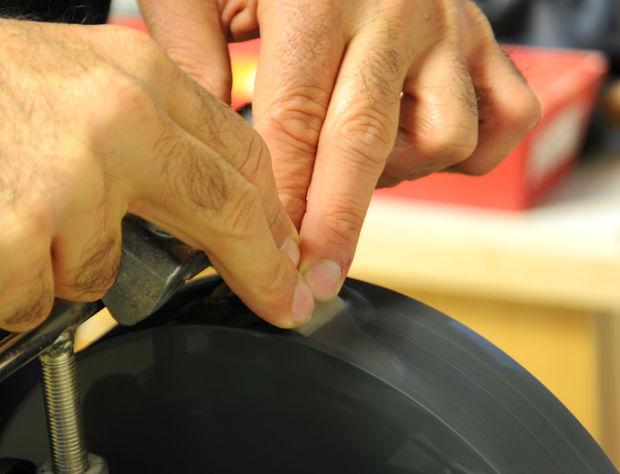
With the use of the spray bottle, get enough water on the back of the sheet of sandpaper to allow enough suction so that it may adhere to the glass. It’s important to determine the condition of the chisel and choose the appropriate sandpaper. I generally find that you should start with an 80 grit piece of sandpaper. Now its time for some elbow grease, move the chisel back and forth (along the long axis of the chisel). Make sure that you keep the back, flat against the paper, until the marks on the back are consistent across the surface. After you have done the initial sharpening you can usually just go strait onto using a 220 grade of sandpaper.
One of the most overlooked part of sharpening a chisel is flattening and polishing the back. Using the following items you can best achieve this.
Recipe for success:
· 1 spray bottle of water
· Sandpaper from grades 80, 120, 150 to 220
· 1 piece plate glass
With the use of the spray bottle, get enough water on the back of the sheet of sandpaper to allow enough suction so that it may adhere to the glass. It’s important to determine the condition of the chisel and choose the appropriate sandpaper. I generally find that you should start with an 80 grit piece of sandpaper. Now its time for some elbow grease, move the chisel back and forth (along the long axis of the chisel). Make sure that you keep the back, flat against the paper, until the marks on the back are consistent across the surface. After you have done the initial sharpening you can usually just go strait onto using a 220 grade of sandpaper.
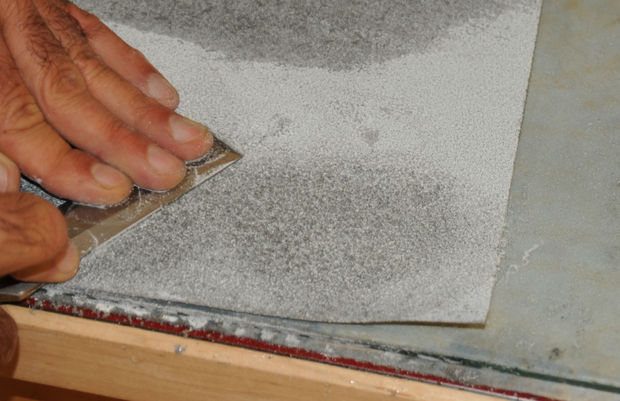
rubbing back of chisel down on sandpaper suctioned onto a class pane
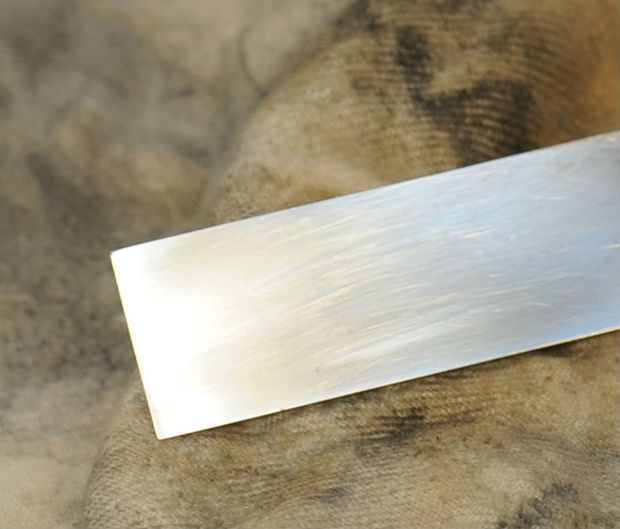
The end product!
Step Four
Once you have flattened and polished the back, its time to work on the bevel.
Option 1 - Grinding
A great tool for this method is a water cooled grindstone. It turns slowly and leaves a very beautiful finish. You may also do this on a regular grinder but you have to be very careful not to overheat the tool and lose the temper of the steel.
Apply pressure very close to the edge of the tool and but use a jig to ensure that the edge of the blade stays square.
Option 2 - Sharpening stone
If the chisel has a cutting edge with only a few marks on it and no serious damage, it can be ground on the coarse side of the sharpening stone, instead of using the grinding wheel.
When using the sharpening-stone, place the cutting iron on the stone so that the bevel lies flat and rub it with circular figure eight movements. Do not rub it just back and forth, as this makes the stone wear unevenly.
Grinding Technique - be careful of your fingers
Sharpening - Stone
Step Five
Now it is time to hone the bevel.
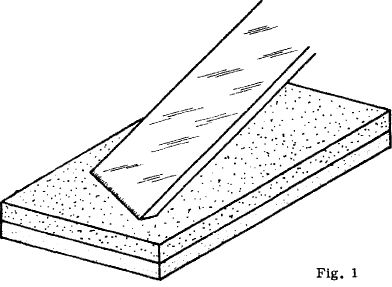
First, soak the stone in water. Place the tool perfectly flat on the stone with the bevel up and push it forward (Fig. 1). A few strokes will turn the burr from the flat side of the tool to the side with the bevel (Fig. 2).
When the wire edge turns, turn the tool over so the bevel is flat on the stone and hone lightly on the bevel (Fig. 3).
Then reverse the tool again and hone on the flat side. If the honing is properly done, the wire edge will quickly become smaller and smaller (Fig. 4) and eventually disappear. The tool will then be sharp.
Now it is time to hone the bevel.
First, soak the stone in water. Place the tool perfectly flat on the stone with the bevel up and push it forward (Fig. 1). A few strokes will turn the burr from the flat side of the tool to the side with the bevel (Fig. 2).
When the wire edge turns, turn the tool over so the bevel is flat on the stone and hone lightly on the bevel (Fig. 3).
Then reverse the tool again and hone on the flat side. If the honing is properly done, the wire edge will quickly become smaller and smaller (Fig. 4) and eventually disappear. The tool will then be sharp.
Step Six
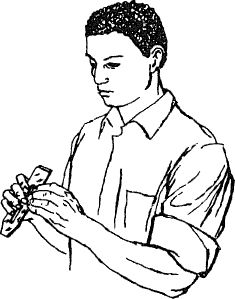
Finally test if your Chisel is sharp.
To check whether the tool is sharp, draw the nail of your thumb across the edge of the tool. Marks, such as may have been caused by a nail, can be detected by holding the iron to the light. A sharp edge cannot be seen, while a dull one will show up in the light and appears as a narrow, shiny surface

A sharp bevel.
Referrence:
http://autonopedia.org/buildings-and-shelter/rural-building/maintenance-of-tools/
http://www.instructables.com/id/Sharpening-a-chisel/#step0
http://autonopedia.org/buildings-and-shelter/rural-building/maintenance-of-tools/
http://www.instructables.com/id/Sharpening-a-chisel/#step0
